
Many plastic car ramps on the market can flex, crack, or slide, especially under heavier vehicles. In today’s project, I’m going to show you how to build your own sturdy wooden car ramps using just 2x10s, wood screws, and a dowel rod. I also added a removable rear stop block for additional safety.
This build is affordable, customizable, and perfect for at-home oil changes and general car maintenance.
Note: this post contains affiliate links. See website policies .
I like to share scripture with each project I create, the verse I chose for this project is:
I sought the Lord, and He answered me; He delivered me from all my fears. - Psalm 34:4
The Tools I Used
- Dewalt Miter Saw
- Dewalt Drill
- Dewalt Drill Bits
- Milwaukee Impact Driver
- Dewalt Impact Bits
- Dewalt Trigger Clamps
- Bosch Countersink Drill Bits
The Materials I Used
- 3 8ft. 2x10s
- Wood Screws
- 3/8" Wooden Dowel Rod
Total Project Cost: $36
Cutting the Lumber for Your Ramps
Each ramp is built using layered 2x10 boards that gradually step upward. I decided to make the ramps 45 inches long, which allowed me to get the most out of my three 8-foot boards while giving the car a smooth incline.
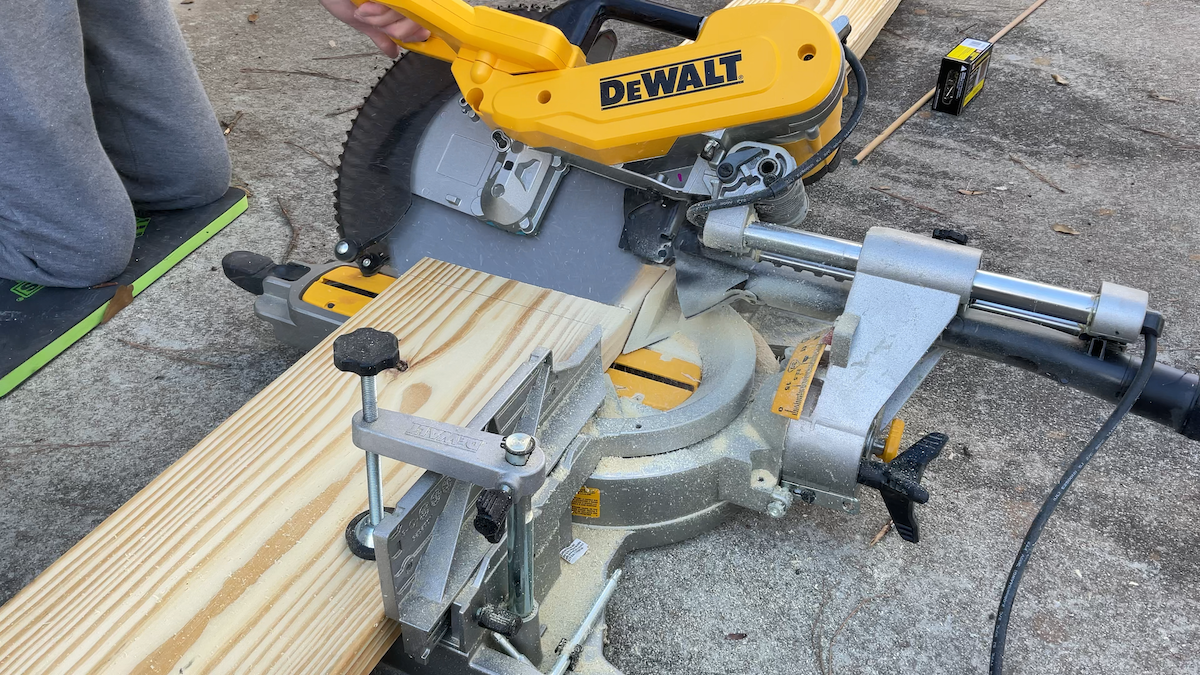
I started by marking my cuts on the first 2x10 and cutting two identical 45-inch pieces, one for each ramp. You can use either a miter saw (like I did) or a circular saw set at a 45-degree angle to create these angled ends.
Measuring the Additional Ramp Layers
Once I had the first angled pieces cut, I laid them out and tested the spacing. For my car, seven inches between the ramps was perfect.
Each additional layer needed to be shorter to create the stepped effect. So, in addition to the 45-inch pieces, I cut:
- 38-inch pieces
- 31-inch pieces
- 24-inch pieces
These four layers form the incline for each ramp.
I also cut a few thin strips of wood that would later be used to build the stop blocks at the top.
Assembling the Ramps
With all the pieces cut, it was time to start assembling the ramps.
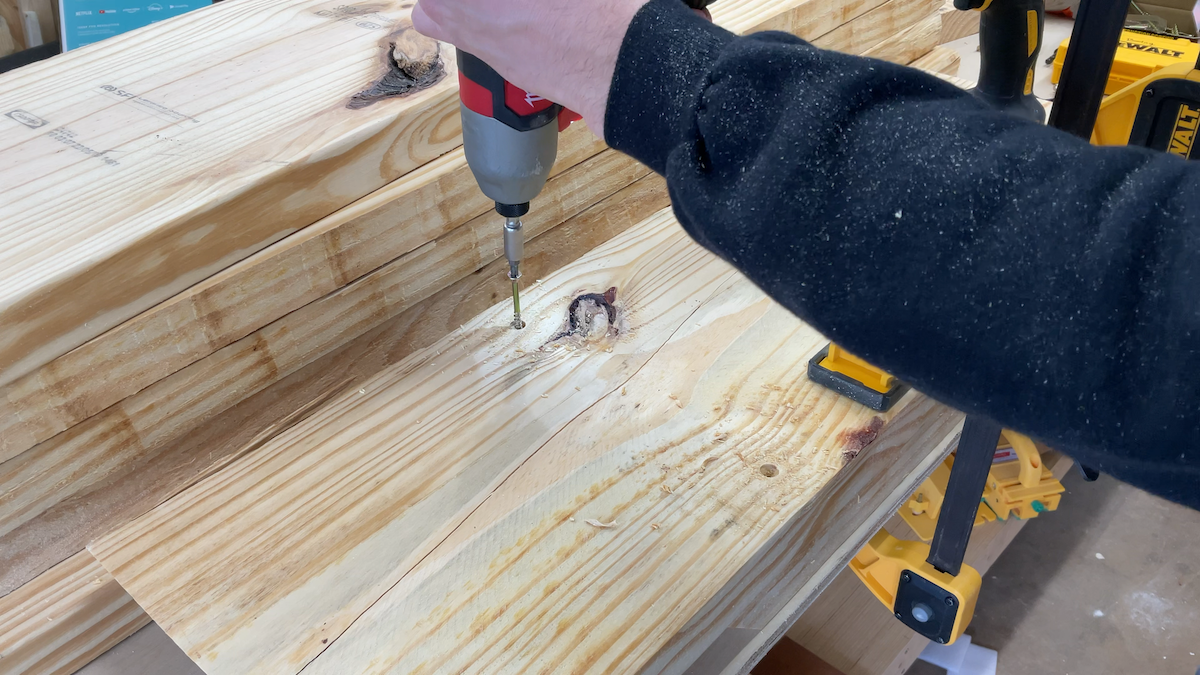
I began by taking the two smallest pieces (the 24" and 31" boards) and aligning the flat end and turning the angled ends so they form a ramp shape. I flipped them over and screwed them together from the bottom so that all screws would remain hidden.
To prevent the wood from splitting and to keep the screw heads flush, I pre-drilled each hole using a countersink bit before driving the screws with an impact driver. A standard drill works just fine as well.
I repeated this process for each layer, stacking them in order until the full stepped ramp shape was complete. Throughout the process, I made sure to double-check alignment as I went.
Adding the Top Stop Block
Once the ramp form was complete, it was time to add an additional safety feature: the front block.
This small piece of wood attaches to the top layer and prevents your vehicle from accidentally rolling too far forward. I simply drilled a pilot hole and secured it with wood screws. It takes just a minute to add but dramatically improves safety.
Creating the Removable Rear Stop Block
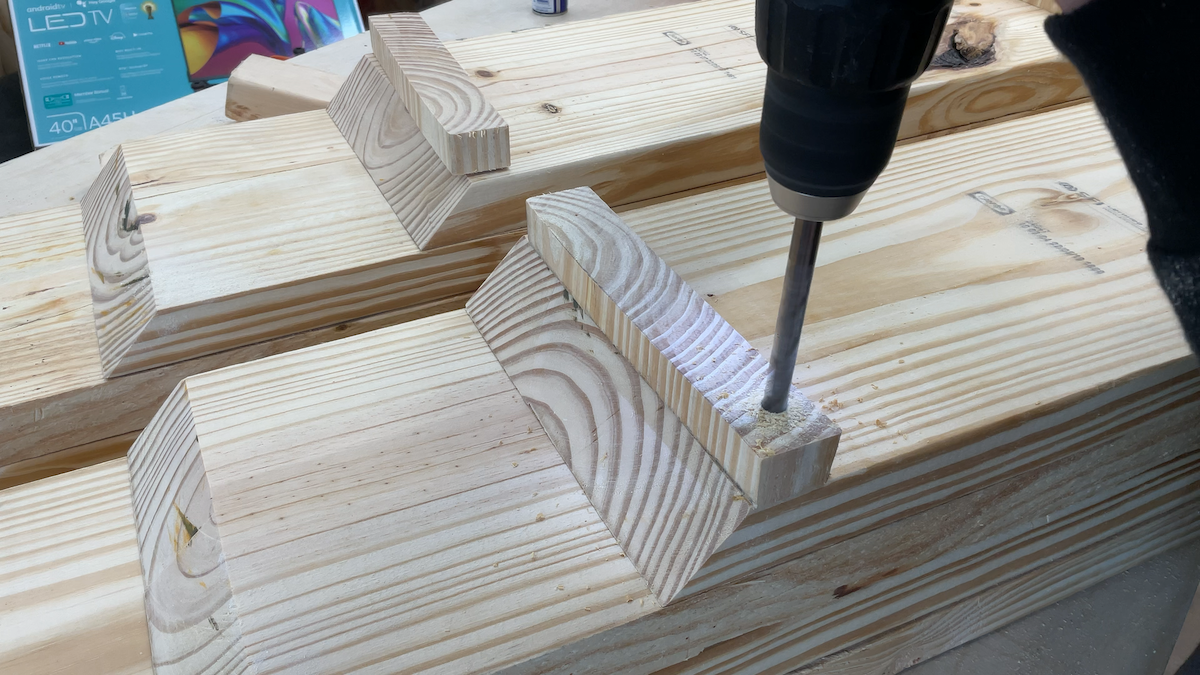
Next, I added a second stop block, this one is removeable and designed to sit behind the wheel once the car is up on the ramp.
This is where the dowel rod comes in. I drilled 3/8-inch holes in the rear of the ramp, which holds the dowels in place. These dowels allow the back stop block to drop in securely but also be removed easily when you’re ready to drive back down.
A quick note: I accidentally drilled my holes at a slight angle. If you drill them by hand, take your time to keep the bit straight, as it can make it a bit harder to remove the stop block.
Once the dowels were cut, I sanded the ends so they would slide smoothly. Then I applied a bit of wood glue to secure them into the stop block, wiped off the excess, and let it dry.
Testing the Ramps
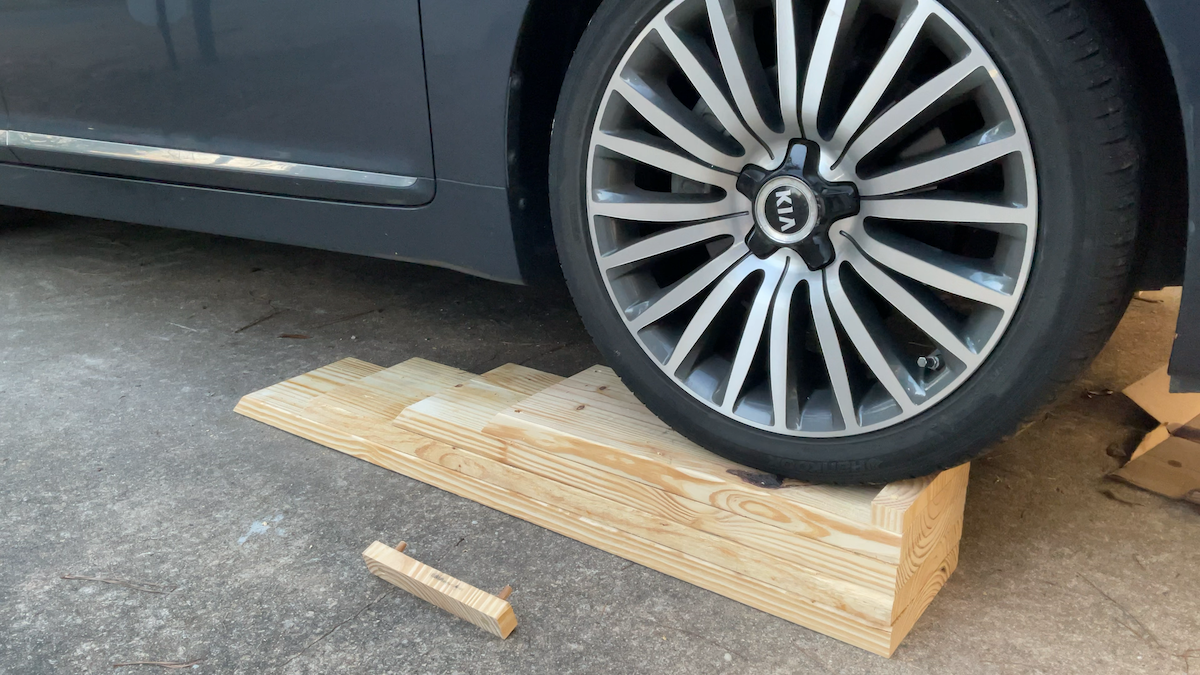
With everything finished, it was time to test them out!
I slowly drove onto the ramps, and they performed perfectly. They didn’t slide or bend at all. The removable rear stop block fit snugly behind the wheel, adding an extra layer of confidence while working under the car.
When I was done, I simply lifted the rear stop block out of its holes and backed down safely.
Final Thoughts
These DIY wooden car ramps turned out great! They are strong, stable, and safe, without the flexing or cracking you risk with plastic ramps. They’re also customizable in length, width, and height to fit your specific vehicle.
Thanks for following along, and I’ll see you in the next project!